Import Data
Real Data vs Dummy Data
If your project is in Development status any real data should NOT be entered until the project has been moved to Production status.
Importing Data
If you have data to Import in to the production server make sure the project has been tested and moved to production status first.
User Rights Setting
The Data Import link is a User Rights setting.
-
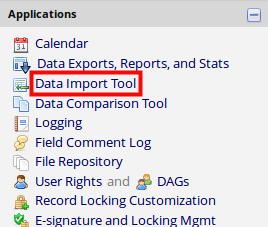
Click the Data Import link on the left hand side.
-
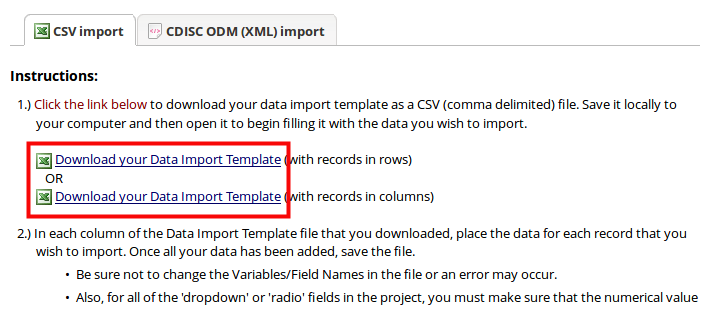
Download a copy of the Data Import Template and save it as a .csv file.
-
Open the template in Excel or LibreOffice and enter the data you want to import. When you are finished, save the file as a .csv
Good Practice
- Do not change the Variables/Field Names in the file;
- Enter only numerical values in the dropdown and radio cells;
- Delete any empty rows and columns before importing the file;
- Be aware of any Branching Logic within your form. The data that is imported may be correct but may cause conflicts with form logic;
- Import only 1 form at a time to ensure you are not overwriting existing data;
- If you are entering dummy data you can use the "drag" function in Excel to create random dates or data ranges to test validation configurations;
- Double check your date and datetime formats are correct: YYYY-MM-DD or DD/MM/YYYY etc;
- Check the complete fields have either 0, 1, 2. This will set the status of the form.

-
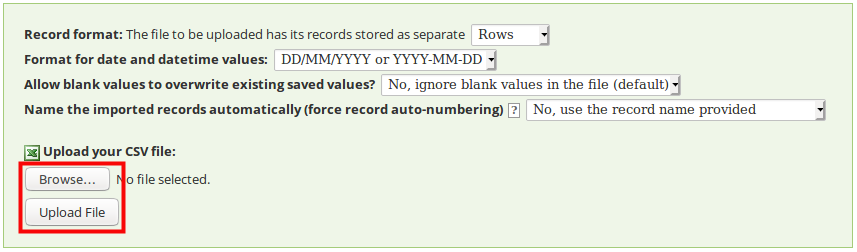
Go back to the Data Import screen. Click Browse to select the import file on your computer and continue to Upload File.
Double check
Check that these options are set correctly. Failure to do so will overwrite your existing data or generate unwanted data.
- Format for date and datetime values
- Allow blank values to overwrite existing saved values?
- Name the imported records automatically

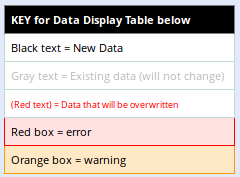
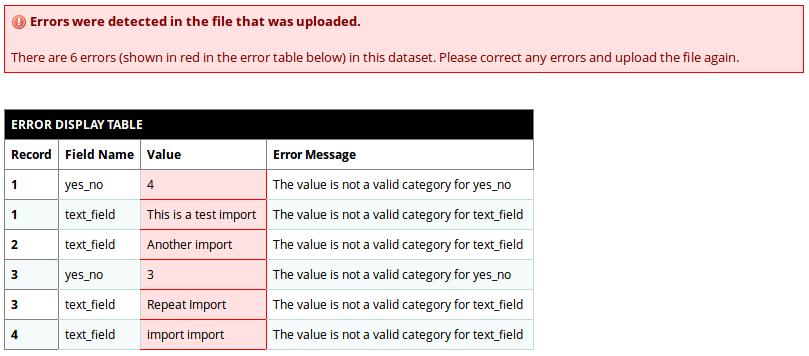
Data Quality Check
The Data Import will display the number of records that were created or modified during the import to allow you to confirm that all records were imported.
Any data that does not conform to your configuration will be flagged. A list of how to resolve the issues with the import will be provided. No data will be imported until the conflicts have been resolved.
-
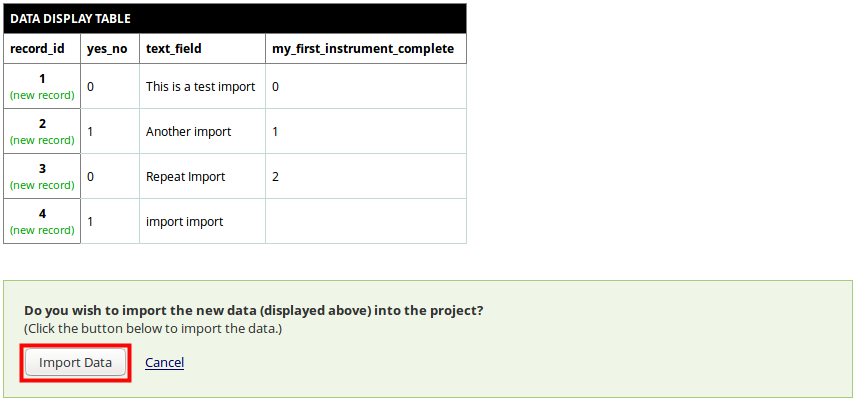
Once your data has been Quality Checked, and any conflicts resolved, the Import Data button will appear.
Please Note
Uploading in batches may be preferred if it takes along time to upload all data.
-
The Import Successful message will appear once the import has been completed.
